QuickBooks provides various accounting activities programs that help the user to handle business accounting in a manner and organized way. The QuickBooks Database Server Manager is one of them. It enables the users to share the QuickBooks company files with another computer over a network. It also optimizes the multi-user network.
Whenever you set up a network for sharing the files, you need the QB Database Server Manager, by which users can easily access them. With this blog, we are going to present the procedure for setting up the Database Server Manager. We will provide you with the steps to know how you can use it. Let’s get started.
How to Download & Setup QuickBooks Database Server Manager?
You download the Database Server Manager QuickBooks to run the multi-user access. It enables various users to work on the same QuickBooks company file simultaneously. If you are not going to use it for the multi-user mode, then don’t download and install it on the computer. Now, follow the given steps:
Step 1: Install QuickBooks Database Server Manager
As the QBDB Server Manager is a part of the QuickBooks Desktop file (.exe). So, install the QBDBMgrn on your server computer to host your company file. Go with the following steps:
- Firstly, on your server computer close all the programs, even QuickBooks.
- Now, open the QuickBooks installer file, setup quickbooks bank feeds.exe. If you have a good internet connection and you can update QuickBooks, then update it.
- Now, go with the on-screen measures to install QuickBooks.
- Click on Accept the License Agreement and Next when the agreement screen comes.
- After accepting the agreement, you have to choose the installation type – Custom or Network Install and click on Next after choosing. Don’t select Express install.
- Now, for your network setup choose the prominent option and click Next. Don’t worry about both steps: download the QuickBooks Database Server Manager. However, if your server computer already has the QuickBooks Download , it will not overwrite existing company data.
- Choose “I’ll be using QuickBooks Desktop on this computer, AND I’ll be storing (We strongly recommend this option), to get QuickBooks Desktop and the Database Server manager on the server manager,
- Choose the “I will not be using QuickBooks Desktop” option if you only want the Database Server manager on the server computer.
- Now, follow the other on-screen steps.
- Enter the QuickBooks License and Product number.
- Click on Install when you are all set. Windows might ask you for permission.
Step 2: Configure Firewall Settings for QuickBooks
There are multiple versions of QuickBooks Desktop (Year Wise) on the same computer. So it’s mandatory to check and add firewall port exceptions for the QuickBooks programs and the QuickBooks Database Server Manager. Follow the given steps:
- Go to Windows Start.
- Then, in the Search box, type Windows Firewall and then open it.
- From the Windows firewall, click the Advanced Settings option.
- Afterward, right-click on the Inbound Rule and then click on New Rule.
- Now, choose the Port and then the Next button.
- Here, ensure that the TCP is chosen.
- In the next step, you have to enter the specific ports in the Specific ports which are being required by the QuickBooks year version.
- QuickBooks Desktop 2020 and later: 8019, XXXXX.
- QuickBooks Desktop 2019: 8019, XXXXX.
- QuickBooks Desktop 2018: 56728, 8019, 55378-55382.
- QuickBooks Desktop 2017: 5672, 8019, 55373-55377.
By clicking on the Renew option, you can easily change the assigned port number. If you change, then you have to go to the Scans Folders tab and click on Scan Now for resetting the firewall permissions for QuickBooks Database Server Manager. You can only renew the QuickBooks Desktop and 2019 and later version ports. You can’t renew the QuickBooks Desktop older version ports.
Also, read : quickbooks 2021 download
- After providing the port number, click on Next.
- Now, choose Allow the Connection and then click on Next.
- After that, ensure that all profiles are marked, and then click on Next.
- Here, you have to create a rule and name it, such as “QBPorts(year).”
- Finally, click on Finish.
The QuickBooks Desktop 2019 and above versions use dynamic ports. These are the specific firewall ports that are assigned during the installation. It will ensure that the QuickBooks desktop programs entirely use a given port.
Get Dynamic Ports
- First, go to the Windows Start menu.
- Then, compose QuickBooks Database Server manager in the Windows Search box and open it.
- After that, reach the Port Monitor tab.
- From here, find your QuickBooks version and then note down the Port Number. You will have to utilize this port number for your firewall port exceptions.
- After entering the port number, click on Next.
- Now, click on Allow the Connection option and then Next.
- After that, ensure that all profiles are marked, and then click on Next.
- Here, you have to create a rule and name it, such as “QBPorts(year).”
- In the end, click on Finish.
After installing and configuring firewall ports for Database Server Manager, it’s to know how it works.
How to Use QuickBooks Database Server Manager?
Here, we are going to use the QBDBMgrn to scan the company files. When the scan completes, you are able to access your company files from another computer that is on your network. The QBDBMgrn enables you and other users who are on the network to work together with QuickBooks from different computers. The following are the steps:
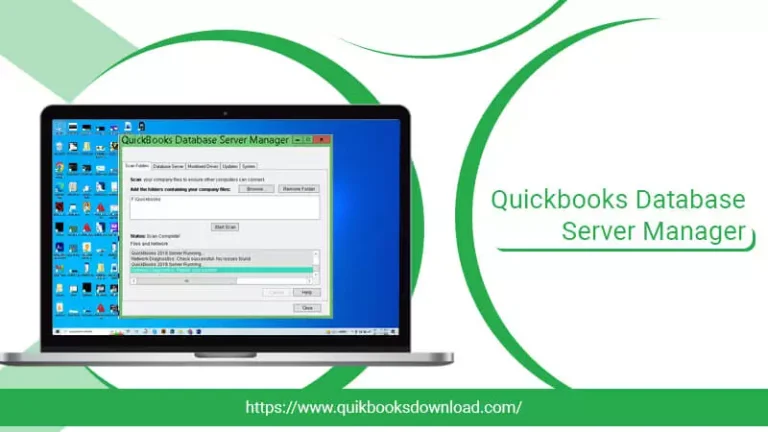
Step 1: Scan the Company File Folder
In this section, we are going to scan the company file folders before sharing the files. You don’t need to scan the files again and again; you only have to scan them once. Scan them with the following means:
- First, go to the Windows Start menu from your Server Computer (which hosts your company files).
- Secondly, search for the Database from the Search field and open the QuickBooks Database Server Manager.
- Now, select the Scan Folders tab.
- After that, click on Browse and choose the Company File Folder (QBW).
- Click on OK.
- Finally, click on Start Scan.
Also, read : quickbooks tool hub download
After the scan, the company file folders will appear in the “QuickBooks Company file found” portion. From here, you can easily access your company file on your network from other computers in these folders.
Step 2: Monitor Your Drives
The drives that hold the company files will appear in the Monitored Drive tab after the scan. After this, you have to choose the drive to monitor these folders. Doing this will ignore to rescan procedure for the already scanned files, even if you move or changes the company files in them: Now, go through the following steps:
- First, select the Monitored Drives tab.
- Then, choose the Hard Drives checkboxes that contain your company files.
Note: Don’t add the drives that don’t hold your company files. You can only monitor the mapped drives or the drives that are introduced with the Database.
Step 3: Manage Your QuickBooks Database Server Manager
When you access the Database Server Manager, you can see other tabs that are running smoothie without any interruption. Now manage it with the following:
- The system tab shows you the Database Server Manager installed location on the computer.
- The Database Server tab provides you with the exact and real-time status of the tool and which tool is connected to it.
Many users face issues while opening the Database Server Manager, or an error pops out; for such scenarios, you must go with the following.
What to do when QuickBooks Database Server Manager Doesn’t Open?
When you can’t access the Database Server or face an error in opening it, you must restart it on your server computer, which contains your company files. Follow the given to restart it for your current setup.
Restart Your Database Server Manager
There are two scenarios for restarting the Database Manager, when
- You install QuickBooks Database Server Manager and the QuickBooks Desktop
- You installed Database Server Manager
Also, read: QuickBooks Error Code H202 Manually
Let’s execute them:
When you Install QuickBooks and Database Server Manager
- In the first step, open your QuickBooks Desktop program on the server computer.
- Now, go to the File menu and choose the Open or Restore Company option.
- After that, choose Open a Company file and find your company file. Click Next.
- In the next step, choose the checkbox of Open File in Multi-user Mode and click on Open.
- Now, you have to sign into the company file.
- Afterward, reach the File and click on Close Company/Log off. Your company file will close on the server.
- Next, go to the Windows Start menu.
- Then, use the Search box to search for the Database and open the QuickBooks Database Server Manager.
If the error is fixed after the above solutions, perform the sharing. But if the error still occurs and you installed the Database Server Manager, then follow the following steps:
When You Only Installed Database Server Manager
- First, go to Windows Start.
- Then, open the Control Panel.
- Now, choose and open the Administrative Tools from the control panel.
- After that, choose Services from the list.
- Here you have to right-click on the QuickBooksDBXX service and then choose Restart.
Note: The XX notifies the QuickBooks Database Server Manager year.
If the Database Server Manager still doesn’t open, follow these steps again.
How to Update QuickBooks Database Server Manager?
Updating the Database Server Manager is not a different procedure, as when you update the QuickBooks Desktop program, it will automatically update to the latest release. So update the QuickBooks Desktop with the given steps:
For Windows
- Select the Help menu.
- Click on Update QuickBooks Desktop.
- Click on Update Now>>Get Updates.
- When the Updates accomplishes, close and reopen QuickBooks.
- When asked, click on Yes to install the update.
- After the installation, restart your computer.
For Mac
- Open the QuickBook menu.
- Click on Check for quickbooks for mac download Updates.
- Click on Install.
- In the end, Relaunch the QuickBooks after the installation completes.
Need Experts Help?
Setting up the QuickBooks Database Server Manager is an easy task. But operating it can sometimes be difficult for new users. So, if you face any issue in setting up or using the Database Server Manager, you can reach out to our Experts through Email or Live Chat and tell them your concern to resolve your issue.
Thank You!